The DUKAPAQ Dashboard Walkthrough: Running Your Business Like a Pro (and Adding Products!)
So, you’ve just signed up for DUKAPAQ’s POS system, huh? Congrats! Whether you’re running a cozy mini-mart or a bustling shop, the dashboard is your new best friend. Think of it as your cockpit — but instead of flying through clouds, you’re soaring through sales, stock levels, and supplier orders.
Let’s break it down and get you comfortable navigating the DUKAPAQ dashboard, with a special focus on the superstar feature — adding products!
Welcome to Your DUKAPAQ Dashboard
When you first land on the dashboard, you’re greeted with a sleek, no-nonsense interface that’s ready to serve you some hot business insights. And don’t worry, it’s not going to give you that complex “corporate spreadsheet” vibe. It’s more like, “Hey, let’s get things done, but let’s make it fun.”
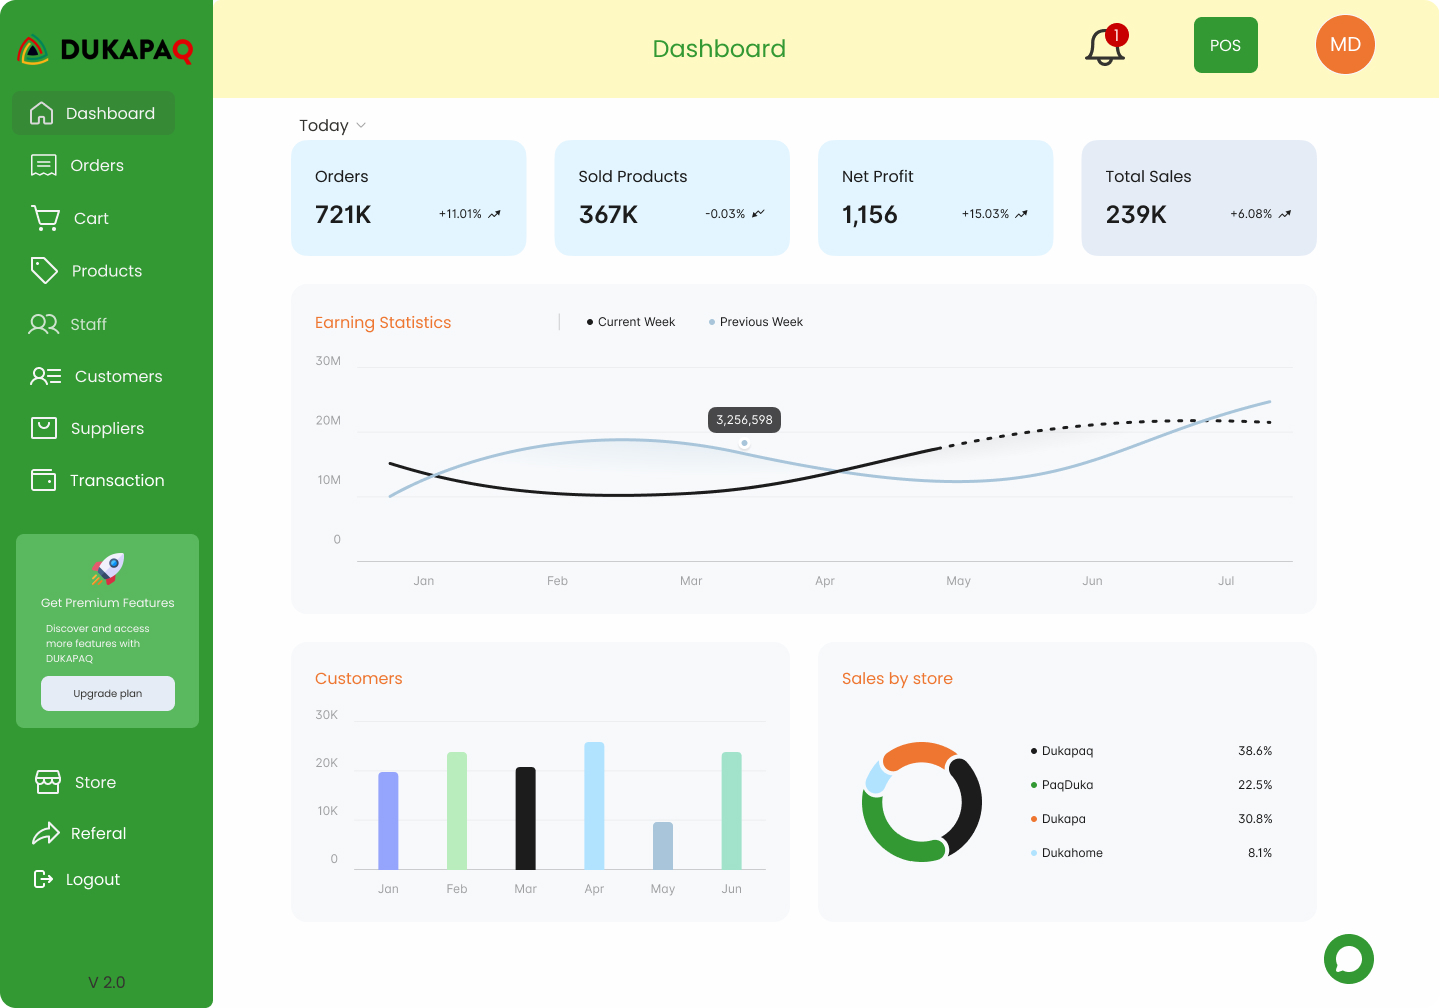
Here’s the main dashboard interface, where you can quickly see some key metrics:
- Orders: This is the number of orders placed in your store for the month.
- Sold Product Units: How many products flew off the shelves? This is your go-to metric.
- Revenue: The big one. This is where you see just how much cash your business is raking in. Think of it as the best kind of scoreboard.
- Customers: You’ll know how many wonderful humans have made purchases, whether they’re loyal regulars or new folks finding you for the first time.
On top of all that, there’s a Sales History graph that gives you a bird’s-eye view of your business’ activity over time. Those sales spikes? Yeah, they’re kind of like the sudden jumps in a Netflix series when something exciting happens — only it’s your business and, well, it’s real money.
Navigating the Dashboard
You’ll also find a simple yet powerful navigation panel on the left side. This is your Swiss Army knife for managing products, transactions, staff, suppliers, and everything else in between. It’s all there, neatly categorized so you won’t need to channel your inner Sherlock Holmes to find what you’re looking for.

Need to manage staff? Check. Set up discount offers? Done. The dashboard’s like that well-organized friend we all secretly wish we could be — always knowing where things are.
But let’s zoom in on one of the most essential tasks — adding new products to your inventory.
Adding Products to Your Inventory (AKA: Let’s Stock Those Shelves)
Imagine your shelves are empty, and your customers are looking for that much-loved candy or a bottle of water to quench their thirst. Tragic, right? Fear not! With DUKAPAQ’s “Add Product” feature, you’ll have those shelves stocked in no time.
Here’s how it works:
1. Head Over to the Products Section
On the left-hand side of your dashboard, click on Products. This brings you to a screen that displays all the products currently in stock. It’s your digital store shelf, and right now, it might be looking a little bare. Let’s fix that.
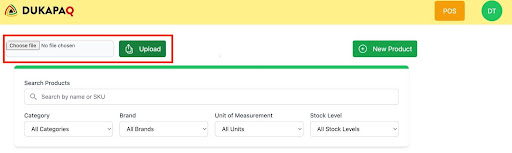
2. Click the “New Product” Button
At the top-right corner of the screen, you’ll see a bright green button that says New Product. Go ahead, give it a click. This is where the magic begins.
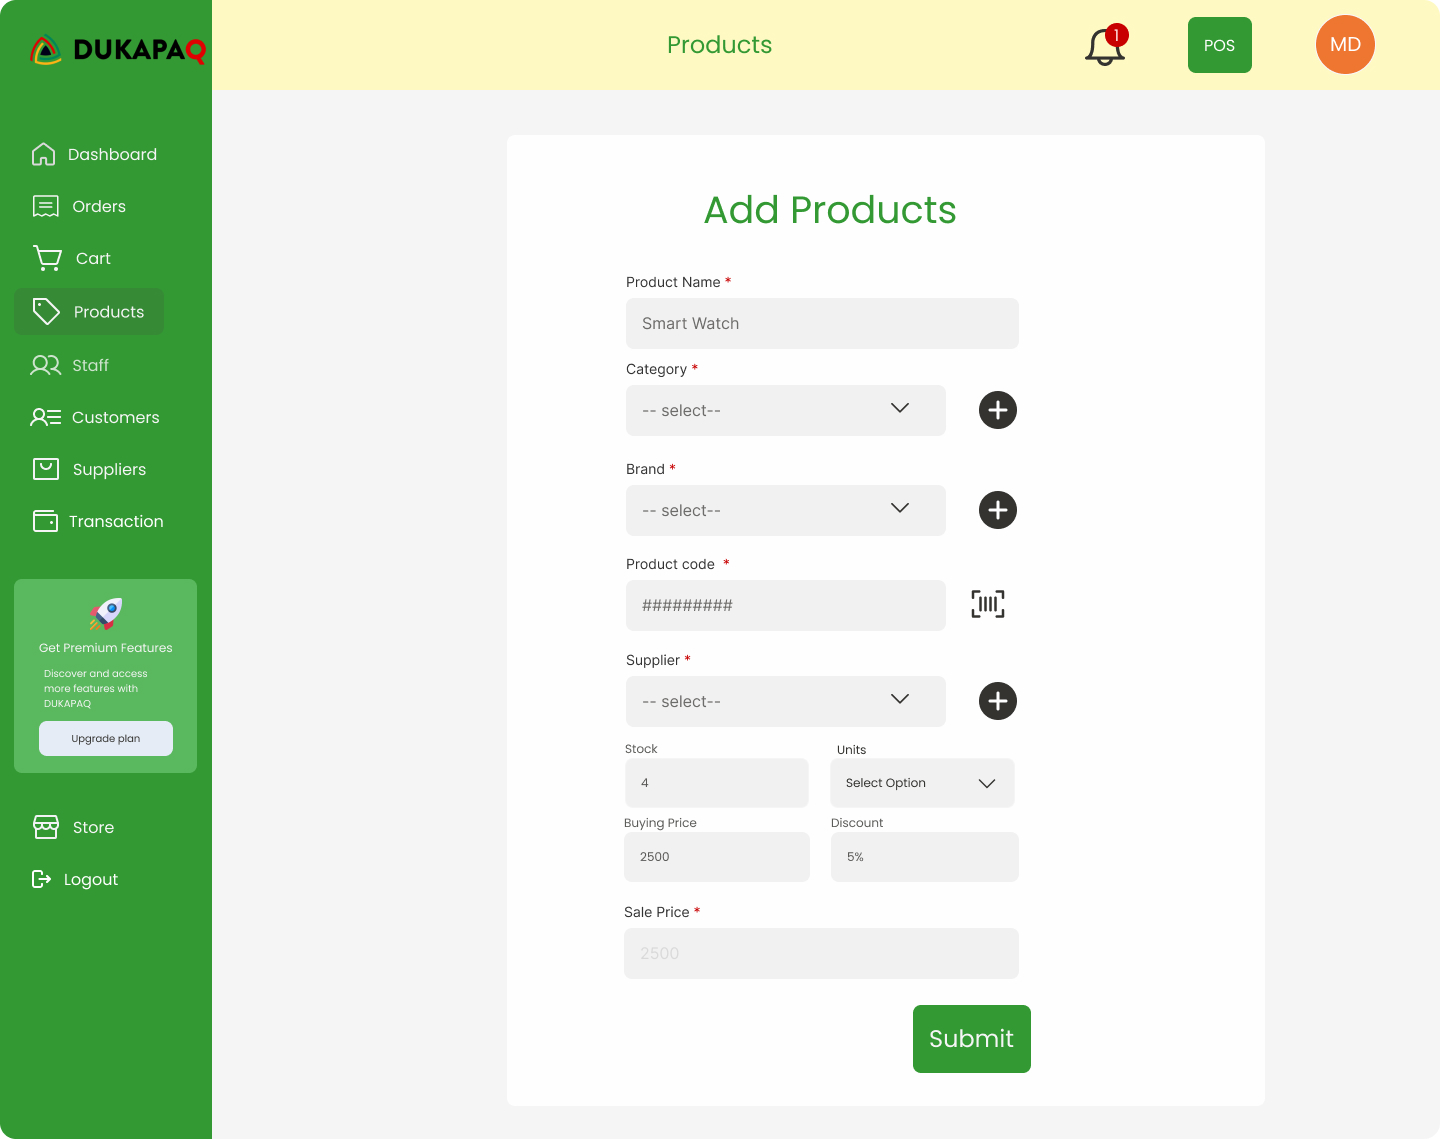
3. Fill Out the Product Details
A form will pop up, and it’s time to get specific. You’ll want to fill out all the necessary fields, such as:
- Product Name: Be as descriptive as possible here. Trust me, “Candy (Haribo)” sounds a lot more appealing than “Random Sweet Stuff.”
- Product Category: Is it a snack, a beverage, or perhaps something more exotic like batteries? Select the appropriate category.
- Brand: Go ahead and tag the brand so you can keep track of which brands are performing the best.
- Product Measurement Unit: Units, liters, or even pieces. This is important if you’re selling things that vary in measurement.
- Supplier: Who’s your plug? Add the supplier details so you can track where your products are coming from.
- Stock Level: Make sure you enter your current stock level. This is key to tracking how much product you have left before it’s time to reorder.
- Warning Stock Level: Get ahead of the game by setting a stock warning level. It’s like having a personal assistant give you a heads-up before your best-selling products run out.
- Buying Price & Discount: Enter your buying price and any discounts you’re offering. It’s all about the numbers, and these help you figure out your pricing strategy.
Once you’re done, click save. Your new product is officially part of your inventory.
Uploading Products in Bulk: Because Who Has Time for One by One?
Now, if you’ve got loads of products to add (because, let’s be real, no one wants to add 50 products manually), DUKAPAQ has your back. Right next to the “New Product” button is the Upload feature. Just click it, and you can upload a file containing all your products in bulk. It’s like stocking an entire digital shelf with one click — time-saving bliss!
Wrapping It Up
And there you have it! The DUKAPAQ dashboard is as intuitive as it is powerful. Whether you’re tracking sales, managing inventory, or adding products with ease, it’s all there at your fingertips. No more guesswork, no more paper trails. Just a clean, well-organized system that keeps your business running like a well-oiled machine.
Now go ahead, take your business to the next level, and let DUKAPAQ handle the nitty-gritty. Because let’s be honest, you’ve got better things to do, like figuring out which snacks to stock next!
Happy selling!
Written by Neville Lusimba
Neville is a product specialist at DUKAPAQ, with extensive experience in helping businesses optimize their operations through innovative POS solutions. With a knack for simplifying complex tech concepts, Neville is passionate about empowering business owners to make the most of their DUKAPAQ system.